
 happy weekend!
Tina
happy weekend!
Tina
Process Part II
 So this is the next stage in my process using Studio Calico's Camelot Project Life kit which will go live Sunday!
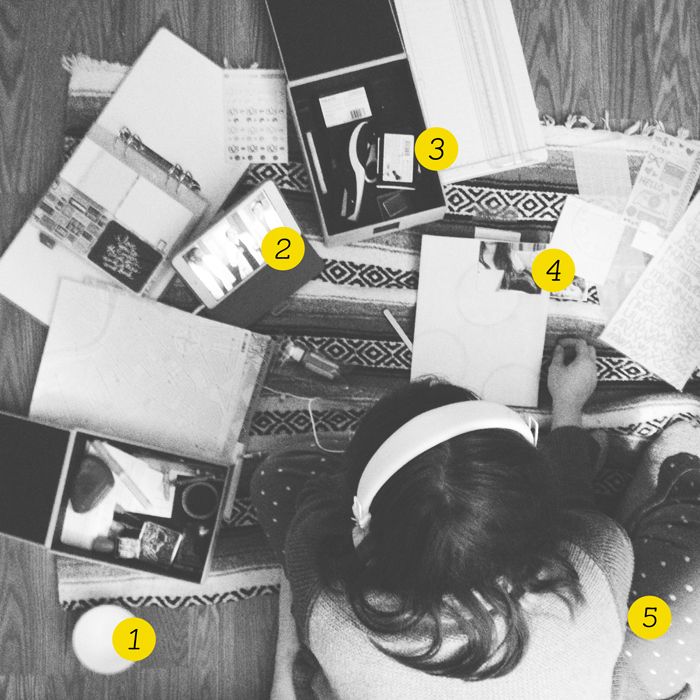
It's about 11 pm on Friday night. Jeff's on his Playstation and I'm catching up on Grey's. This is usually the time I get to watch "mommy shows" and not Power Rangers or NBA.
Here's the breakdown. 1. must have snacks. I'm pretty sure this is a bowl of my son's goldfish. 2. Grey's on the iPad. 3. my box of essentials that I keep on hand. It's a good size to just pick up and take where ever I'm scrapbooking at the time whether it's the floor or kitchen table. 4. this is actually a failed layout I'm working on using the Camelot Scrapbook kit. 5. my favorite pj's I found on the Target clearance section for like, $4 and an oversized sweater my mom sent me. It's like a wearing a blanket.
As you can see, I'm scrapping on the floor again. Even though my husband and I are engaging in 2 separate activities, I still like to be near him. And I really don't feel embarrassed or ashamed to admit we spend a few Friday nights like this. We usually start out watching a movie or something and of course talking about what crazy funny thing Tyler's has done that day.
Ok, back to the process.
For the past few days, I've been editing and uploading photos to PS. I print from home on a Canon MG320 printer. I usually use matte photo paper (Epson or Office Max, whichever is on sale) but I found a big pack of Ilford satin inkjet photo paper last week while thrifting and it is really nice. The only thing I don't like is that I can't stamp or journal on it but still...the photo prints look great.
I really loved Shanna's spreads last month. She used the Collect app and printed through Persnickity but I don't like to wait for my photos to arrive in the mail. I have little patience when it comes to scrapping these days. I created my own layered template through PS to achieve this look which is incredibly simple to do.
You'll also notice that I've applied some digital brushes that will be available on the 27th.
There are times when I can't decide if I want to do a full 3x4 photo or a square so I'll print both. I like options.
After I've sliced up my photos, which btw...I just purchased a new portable paper cutter and I love it. I was using my profesh cutter I use for my screen prints. It's heavy duty and not meant for everyday cutting. I ended up getting the Martha Stewart cutter from Michael's. I used a 40% off coupon and I like that it's white.
Now I'm ready to piece apart the kit. I'm only working with the main kit here. Studio Calico asks us (the ct) to utilize the main kit as much as possible so that is where I start. This was a request on behalf of those members who only sub or purchase main kits and I like that. Additional items can be overwhelming for some scrapbookers (like myself) not only creatively but financially.
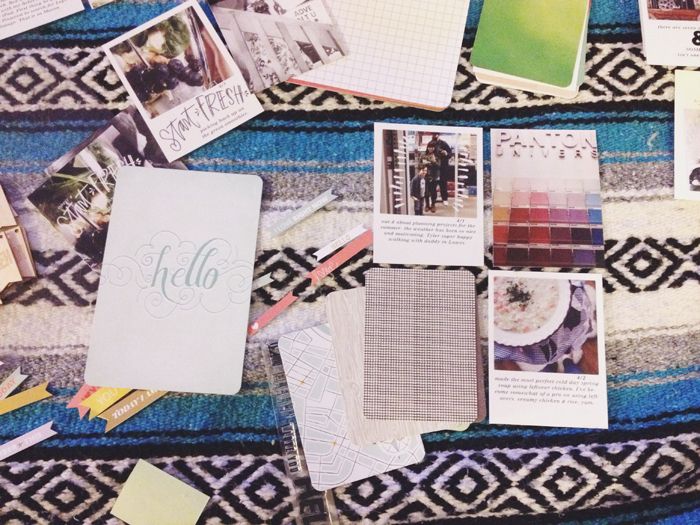
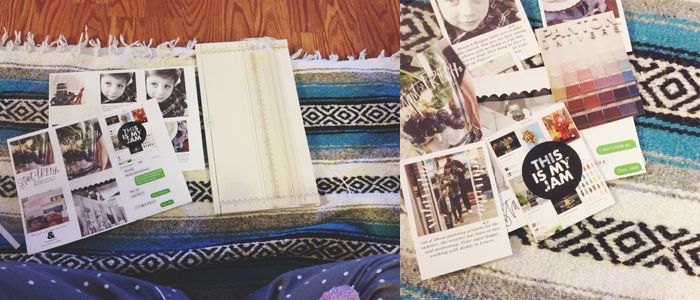
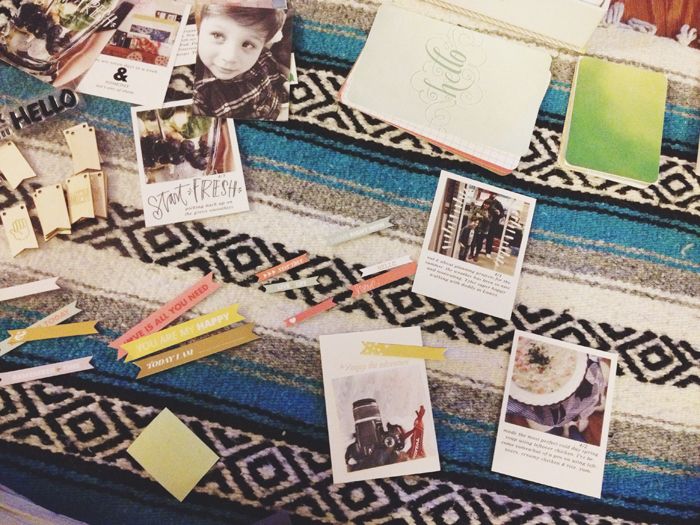
Because it's dark and getting late, I'm just going to plot and do a little planning tonight. I'm matching PL cards to photos here. I'll stack 3-4 cards next to a photo and make final decisions when it's daylight out.
At this point, I can hardly keep my eyes open (it's a little past midnight). I pack everything back into the box and put it away. I've made a point to do this each time I scrapbook. It's easy to just walk away from the mess but I don't have that privilege. Plus it's just the way I do things now (with the kitchen after dinner, etc) I like waking up and walking into a (mostly) clean space. My mind is a cluttered mess to begin with. Keeping my surroundings tidy makes me feel more in control and less anxious. This is me now. I was the exact opposite before Tyler came along. :)
Until next time! Tina
Studio Calico's Mixed Media Class
 Have you ever wanted to learn how to incorporate a little mixed media into your everyday scrapbooking? This is the class for you and it's taught by Celine and Anna-Maria who use mixed media in the most awesome way. I'm always amazed when I see their galleries each month.
You have until April 30th to register! Click here to read more about it.
Tina
 my take on a quote I
 NSD 2014
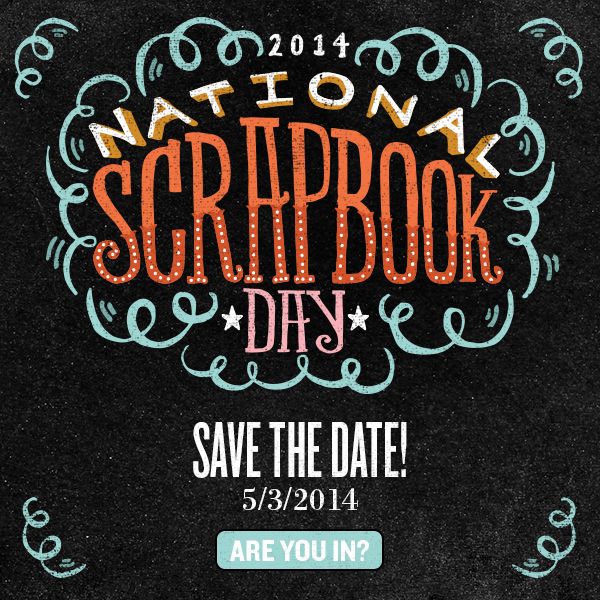 Mark your calendars! Celebrate NSD with Studio Calico on May 3rd! More details here.
Tina
make this! easter cones

It all started with some pretty party hats. Oh Joy for Target party hats to be exact. I purchased them for my birthday (yep, bought them for myself), had a little fun with them but didn't want to part ways just yet. The colors are the perfect shades of spring & they make instant containers. Cue in the Easter cone.
It's extremely simple & a great way to reuse something too pretty to toss. (I snipped up one of the hats for my scrapbook which is just about done)
I've heard that the Oh Joy line is becoming scarce and will be gone in a few weeks. If you can find these pretties, yay! If not, I'm sure there are other suitable pretty party hats around.
These are incredibly simple and only require a few things any everyday crafter would have on hand.


A few notes... *Oh Joy for Target hats were purchased at my local Target. They cost $3. *The ribbons and washi tape are all from past Studio Calico kits. The twine is also from Studio Calico. *All other items (plastic eggs & grass) were purchased from my local Target. *After peeling off the tape, you do want to remove the elastic string.
Have fun giving these a try! My little guy loved helping me put these together. Great make for little ones!
Tina
The process: part 1

I thought I would walk through my process of working with Studio Calico's monthly kits using the May kit. I can't officially show you any product until after the 13th (sneak night) so you'll just have to hang in there. I know all those muslin bags are a big tease. :)
After all these years of receiving kits, it still excites me to see the big brown box on my doorstep. My mail lady is well aware of this.
The first thing I do is snap a photo for my Instagram feed and hashtag it #mysckitishere because it's fun to see everyone else's excitement with the arrival of their kits.
I usually start with my Project Life stuff, main kit first. I'll go through each card and embellishment and weed out what works for me and what doesn't. It's usually 3 piles. The "omg, I love this SO MUCH and must use it" pile. The "I like this but not sure it'll work right now" pile and the "Meh" pile which usually consists of items that I find hard to work with.
Next it's the scrapbook kits....it's pretty much the same process. The only thing I do differently is weed out the patterned papers that can be used as backgrounds like a graph paper or something that isn't pattern heavy.
At this point, I make mental notes about what photos will work with the overall theme of the kit. I can make a boy pages out of anything but if it is super girly with pinks and florals, I'll try to use photos of myself or my niece. If an idea strikes me right away, I'll jot it down or maybe do a quick map of a layout and snap a photo with my iPhone. I very rarely start in with my kits as soon as I receive them. They usually get packed away for the weekend or until I get photos printed and can dedicate a night to starting.

Now that my kit is packed up, it's time to get my photos ready. I start with photos I already have printed from past months. BTW, I pack my kit up because I scrapbook downstairs in the main living space or dining room. If I had a dedicated space, It would probably be spread out on my desk.
Random notes....
1. Evidently it was pant less toddler day. 2. He worked hard (& begged harder) for this Power Rangers Morpher thingy. He carries it everywhere. 3. This dog. Always next to me no matter where I am in the house. 4. Pile of photos from previous months. 5. Comfy (ugly) sweats and even uglier (comfy) socks are kind of must for me when I scrapbook. Keepin' it real folks.
That's all for now! I'll be back next week with more of my process. Tina
workspace wednesday

Lunchtime! Whipped up a quick and spicy wonton soup using frozen shrimp wontons I made last week. I used this recipe for the wontons. Made & ate a few then froze the rest. My quick broth recipe: (single serving if you're hungry)
4 cups water 1 Knorr's chicken bouillon cube a generous tablespoon of low sodium soy sauce a few drops of toasted sesame oil a generous teaspoon of garlic chili sauce a little bit of salt garnish with cilantro
Bring ingredients to a gentle boil, turn down the heat and simmer. Add frozen (or fresh) wontons. I added 5. Cook about 10 minutes for frozen wonton, less time for fresh. Add cilantro or sliced scallion. Maybe a little dash of Sriracha sauce. :)

-I usually add a small knob of ginger (leave whole) and sliced scallions but I didn't have those on hand at the time. The cilantro was an after thought but it was just as delicious.
Forever eating at my desk. Working on a series of 5x7 screen prints that will debut next week. Chose to not turn on Pandora like I usually do. The quiet was perfect. Emails & bills, etc. This is my workspace wednesday. aka #hfworkspacewednesday
Tina
magic monday

This whole magic thing. It's been on my mind for awhile. It started one Monday when I was driving Tyler to daycare. I had a long list of to dos and the inspiration level was on high. I said to my son, "Tyler, mommy is going to make magic today." He replied, "magic?!" in the funniest voice. It totally blew his mind. It held me accountable though, saying it out loud. Not just something I said in my head and dismiss later.
It's a day I put ideas into action. I'm hoping to reveal LLP's new designs by the end of the week. Sneaks will be posted on my IG account. I'm also going to hold flash sales of misc items like misprints and items that didn't quite make the cut.
It kind of makes me sad that I missed out on this print which is kind of perfect. I know Mondays are/can be a drag. Trust me, I know this. But I'm trying to tackle it in a more positive way, hence Magic Monday.
Mondays are for action. Mondays are for magic.
Tina
PS. The ladies at A Beautiful Mess were kind enough to send me their new PS actions to play with. The photo above was done using Paris in ABM's Fresh Collection. I'm a big fan of hazy photos. This particular PS action is gorgeous. The best part about these actions is that each layer is customizable meaning you can adjust the opacity and delete certain layers to create something completely unique.

friday faves
 A few things that inspired me this week.
1. I'm a fan of "where I stand" selfies. I really want to recreate this one with the map I just scored last week. (pin)
2. This one is really REALLY good. There's so many of us in the ultra competitive crafting world. Surely we need a little bit of that competitive spirit to light a fire under our asses. I'll be the first to admit that I am a competitive person, not so much to "beat" the other person(s) but rather to spark that energy to do my best within myself. But when it comes down to it, there's room for all of us. (pin)
3. Shanna Noel's PL spread for the Bluegrass reveal makes me rethink my whole game plan. (pin)
4. Pops of color on neutrals grays and muted whites. LOVE. This is what I've been trying to achieve in my own home for years. (pin)
A few things that inspired me this week.
1. I'm a fan of "where I stand" selfies. I really want to recreate this one with the map I just scored last week. (pin)
2. This one is really REALLY good. There's so many of us in the ultra competitive crafting world. Surely we need a little bit of that competitive spirit to light a fire under our asses. I'll be the first to admit that I am a competitive person, not so much to "beat" the other person(s) but rather to spark that energy to do my best within myself. But when it comes down to it, there's room for all of us. (pin)
3. Shanna Noel's PL spread for the Bluegrass reveal makes me rethink my whole game plan. (pin)
4. Pops of color on neutrals grays and muted whites. LOVE. This is what I've been trying to achieve in my own home for years. (pin)
Happy Friday ya'll! Tina
Pin*approved recipe

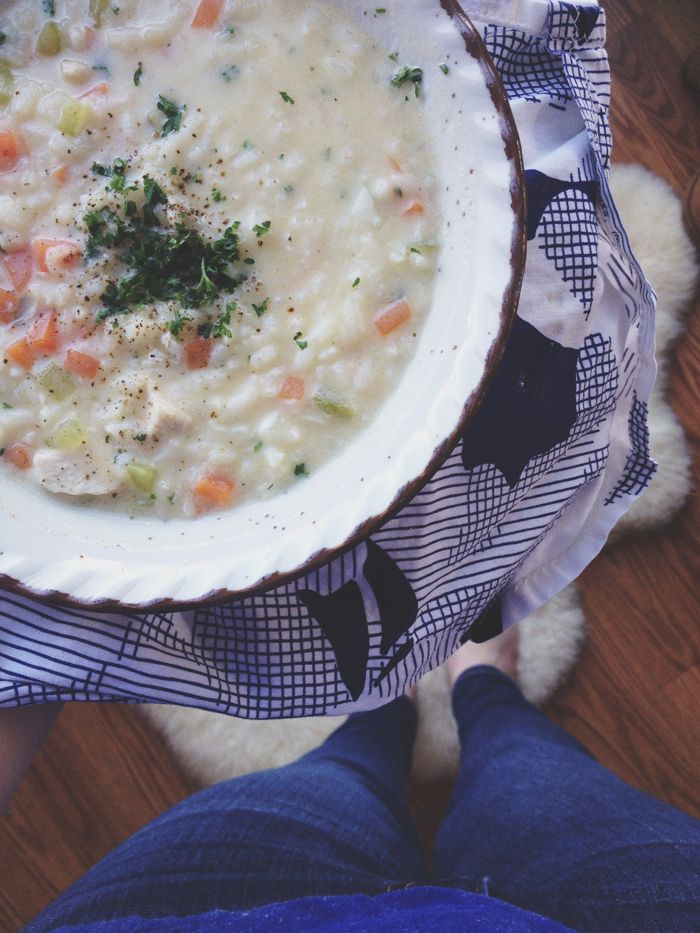
Even though it's spring, it's still a bit chilly up here. I had returned home after a morning full errands. Why I decided to wear flats is beyond me but I immediately put on my big ol' fuzzy slipper socks and headed to the kitchen to prepare a pot of soup for me and the boy. Jeff's not a big soup fan (more of a sandwich/burger guy) so I almost always cut a recipe in half, especially with soups that include rice or pasta. Just doesn't keep well.
I knew I wanted to make chicken soup because there were a few pieces of leftover roasted chicken in the fridge from the night before. Half of it went into Jeff's sandwich. The other half was destined for better things. : )
Picked up my trusty iPad, opened up the even trustier Pinterest app and searched for something new. The 2 other go to chicken soup recipes I keep in my mental vault wasn't going to satisfy my craving. I stumbled upon a pin that said "best soup ever". Okay. That's quite the bold statement. I scan through the ingredients. Looks easy enough. Then I saw 2 eggs listed. Huh? Eggs? Weird, I thought. But I was really curious as to how this all ended up being a creamy soup without any sort of cream which is a big plus for me. It wasn't a day for a heavy, cream filled, buttery soup.
You guys, this recipe is AMAZING. So simple and so satisfying. What I love is the creaminess without that heavy feeling sitting in your tummy. It's the eggs! Go figure. It makes total sense though.
I altered it a bit the second time around. The boy complained about it's "sourness" from the lemon. I personally loved it. I did cut the recipe in half (still added 1 whole carrot and celery) and only added the juice of half a lemon. So good.
The photo above was the first attempt, more soupier. The second attempt below came out a little thicker due to cutting back even more chicken stock. I preferred the first version.
You can find the original recipe here.
Tina
birthday weekend
Turning 29 (+7) was pretty good. Great actually. I was pleasantly surprised by my loved ones who gifted me pretty things and sweet confections. My heart is certainly full.

Loving the Oh Joy for Target collection...had to nab the party hats and balloons for a little bday fun.
I shopped my heart out (within my means) and ate way too much but birthdays are meant for such indulgences, no? Shopping consisted of the art store and numerous thrift shops. It must have been my bday luck because I found some sweet treasures which included a midcentury dresser. I have been hunting down midcentury items for the past year with no such luck and I'm talking affordable midcentury here. Not the pieces you find in antique shops with outrageous price tags. It needs a little repair but for $40, it was a steal. I'll try to do a before and after photo.
The Mr and I spent an afternoon together sans the boy which we haven't done in a long while. It was so nice and we really need to make a point of doing this more often. I was most excited about stopping at an Estate sale on our way to pick Tyler up from his Aunt and Uncles (who he adores). The bright "George's Estate Sale" sign drew me in. "Let's go look at George's stuff!" I exclaimed.
It was strange to just walk in someones home and rummage through things but man, it was FUN. I mean, seriously...it was such a high. You thrifters know of the high I speak of. And then you see that gem shining through the old books and ugly pieces of 80's furniture. There I found a metal shelving unit in a cutest shade of yellow. $2. To my left, and old US map. .50 cents. These things I see on Pinterest and in my thrifting dreams are now being carried by my husband and soon to be in my home. Sigh.
At this point, I'm amped on getting my office redone. I'm seeing peg boards, a new workstation...it needs to act as my printing room as well so if you follow me on Pinterest, you may see an influx of office re-dos. Fair warning.

And I leave off with this quote which I happened to stumble upon a few days before by birthday. Really feeling it. (can't find the original source but here's the pin)
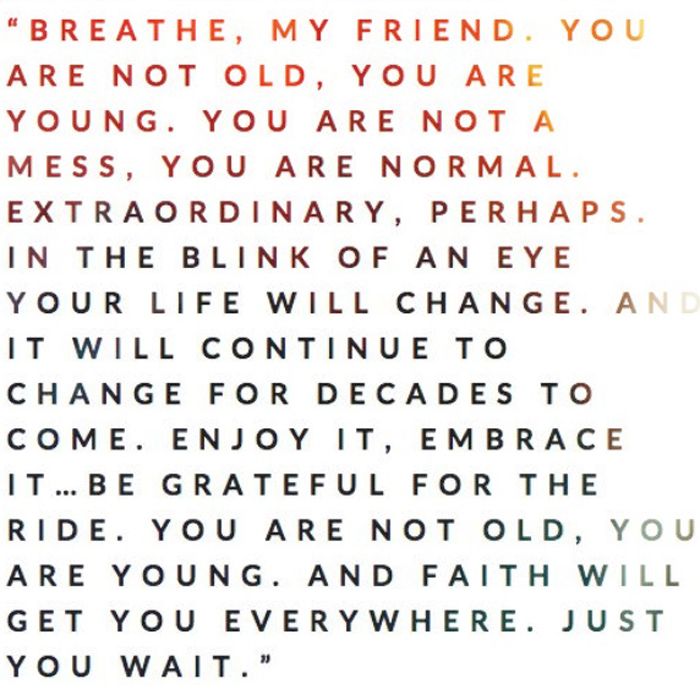
-Tina
PL 2014 so far
 From the beginning of January.
2014 card designed by Jamaica Makes for Kelly Purkey. The "break tradition" fortune is a png file from the Paislee Press Brightside kit. It really sets the tone for my year.
From the beginning of January.
2014 card designed by Jamaica Makes for Kelly Purkey. The "break tradition" fortune is a png file from the Paislee Press Brightside kit. It really sets the tone for my year.

A bit of an incomplete spread. Need to add some journaling. Mostly Studio Calico bits and pieces for this one.

This was one of my spreads from the Office Hours Studio Calico kit. Truth....I get a little bored with the page protector offerings and these have yet to come in. Until then, I'll experiment more with sewing my own pockets. The idea was inspired by Elise's layout.

Another spread from the Office Hours kit. Love using bits of happy mail in my PL.

The funny thing about my "let it go" postcards and print is that I created it before I saw the Frozen. Letting it go has always been my flaw. I don't do it enough. I'm trying (really hard) though. Of course when I finally did see Frozen, I FELL IN LOVE. I've never loved a Disney movie more than this one. Brave is a close second.
Used the frame from Paislee Press's Picture + Words 9 kit (awesome templates) + these gold geotags. The red LOVE heart is from BG's Capture chipboard set.

I used Liz's Picture + Words 9 template here. I'm not a huge lover of the 4x6 pocket but these templates make it easier for me to use. The yellow hearts on my numbers print is a nice insert for some wording and simple journaling.
My process has been pretty sparadic so far. I'm not following weeks or trying not to worry too much about exact dates.So far, so good!
Tina

This holiday holds a lot of meaning for us. I'm sure I've mentioned this before. It was the day in which our son was conceived. St Pat's Day 2010. I know this because it was the day of my last IUI. It was the day I came to accept whatever outcome God had planned for me. Whether that was a positive pregnancy test or embracing the fact that I would never be able to have children on my own.
I can't explain the feeling exactly. Kind of like a calmness that washed over my body as I lay on the patient table, paper sticking to by behind. I didn't stare at the stupid inspirational poster while twiddling my thumbs and worrying. I came prepared with a book (Anthony Bourdain's Kitchen Confidential) and a clear mind. And you better believe I wore my green. I am a smidge Irish.
Not to say that that was the reason why a few weeks later the pregnancy test finally showed that damn positive sign I had wished, hoped and prayed for. I'm sure it was the calm & acceptance. You know how everyone tells you to not stress when you're trying and all you want to do is shove it back down their throat? Yeah. I've been there.
Today I will celebrate the calmness and acceptance of what lies ahead. Happy St Patrick Day, Tina
shop update!
 I just put up some leftover screen prints in the shop. Quantities are limited!
There is also some new digital artwork available. If you're looking for an inexpensive way to add a bold statement to your walls, this is it. And there's more to come! These files are sized and ready to take to your local print and copy shop. I will provide more directions with the files but you're basically going to get a huge black & white print for a couple of bucks if not less!
You'll ask for your file to be printed as an engineer print. These are large format printers that only print black and white copies. These prints come out a bit weathered and vintagy. I love the look.
Yes, this is the same manor in which I print my photograph b&w posters that are currently in the shop. You may be wondering why I'm selling them for $30 when you can have a file printed for next to nothing. Well my friends, I'm selling the photograph and artwork, not the paper in which it was printed on. I know this has been a long time issue with photographers. I've dealt with this many a times when I would take on sessions.
I see so many great pieces of art out there and it's gotten so affordable! Every once in awhile I'll splurge and buy something not only for me but for the artist/maker. Gotta support when and where we can, right? But because I don't have the income to fill my home with such treasures, I decided to create something big, bold and graphic and most importantly, inexpensive.

I spent a total of $28 on this framed print. The most expensive part was the frame itself. The print? $3 at my local FedEx Kinkos. There's also a variety of ways to hang the prints for a lot less than the cost of a frame. All those rolls of washi tape. Some pretty wood thumbtacks from the Target dollar spot. I also love this tutorial on how to apply a print directly onto a blank canvas. Genius!
-Tina
Right now
 Spring Forward! they say.
I'm not much of a springer. This particular time change is hard. It's not that I'm NOT enjoying the extra daylight because I DO. It's all kinds of wonderful, especially when you're an Alaskan. It's just this "off" feeling that I can't shake. It feels like that one episode of Unsolved Mysteries with the case about missing time. Remember that show?
So yeah, that's me right now.
Good things are happening though.
Spring Forward! they say.
I'm not much of a springer. This particular time change is hard. It's not that I'm NOT enjoying the extra daylight because I DO. It's all kinds of wonderful, especially when you're an Alaskan. It's just this "off" feeling that I can't shake. It feels like that one episode of Unsolved Mysteries with the case about missing time. Remember that show?
So yeah, that's me right now.
Good things are happening though.
1. Husband looks at me and says "you're having a good hair day". 2. FLOWERS 3. New prints will be in the shop later today. A few extras items leftover from the first print pack of the New Year and something new. I'll be offering up digital art prints that you can print from home or at your local print & copy place. 4. My April kit came in! A day early to boot!
-Tina
loving
 1. S'mores mug cake? Definitely trying this.
2. yes.
3. mood.
4. color.
5. pretty.
6. stay fierce girl.
7. wonderful you.
8. oh.
9. Roar.
1. S'mores mug cake? Definitely trying this.
2. yes.
3. mood.
4. color.
5. pretty.
6. stay fierce girl.
7. wonderful you.
8. oh.
9. Roar.
Happy Friday folks! -Tina
 -photo edit done with ABM's Folk Collection.
I love the beginning stages of a project. When ideas are collected from inspiring publications & a mind clearing walk. Your workspace is cluttered with notes & sketches accompanied by a mug of fresh coffee (or tea). It's that "golden hour" of an idea where everything is bathed in the most beautiful light.
-photo edit done with ABM's Folk Collection.
I love the beginning stages of a project. When ideas are collected from inspiring publications & a mind clearing walk. Your workspace is cluttered with notes & sketches accompanied by a mug of fresh coffee (or tea). It's that "golden hour" of an idea where everything is bathed in the most beautiful light.
This is the easy part.
It's when you hit that block, that bump in the road that stalls your idea. You may want to abandoned the project or you get frustrated and say a bunch of curse words at it. My advice? Walk away for bit. Better yet, change directions. Most of the time that's what an idea needs. Room to grow and evolve. It's all apart of the creative process and you have to accept the not so beautiful part. BECAUSE IT'S WORTH IT.
-Tina
LLP's new direction
 The very first LLP paper pack of the New Year is sold out. Unlike last years paper pack, these will be done in smaller quantities BUT will be done more frequently. That means new stuff is right around the corner! So if you missed out on this paper pack, don't fret. Another one is in the making.
I will have some bits and pieces from the first pack in the shop later this week. I do still have the Worth It postcards available. That quote carried me through many, many moments in my life. The years of trying to have a baby was the most significant. And now that I'm switching gears with LLP, I can be assured that I am on the path to good things.

Something new to the shop are these 18x24 b&w prints of my own photographs. Photography was/is my first love. Before scrapbooking, before screen printing, before rubber-stamping, there was me and my camera. I had shared my photographs a while back but now I've reintroduced them in a more modern, unique way that I absolutely love.
I'm including a complimentary mini print with each order. Hang it, cut it or share it. I love using these prints in my Project Life. I'll share more of my progress this week.
-tina
Office Hours Reveal
[vimeo 87821537 w=500 h=500] Studio calico office space reveal from Tina Aszmus on Vimeo.
Hey guys! I probably don't have to remind you it's reveal day over at Studio Calico. :) I wanted to show a quick tutorial on how I created the watercolor flowers on my Never Stop layout. I started with the flower stamp in the Office Hours main scrapbook kit and applied black watercolor paint directly over the stamp using my Niji waterbrush. Just stamp onto regular card stock or watercolor paper! I cut mine out and placed them onto my layout.

Have fun shopping tonight!
-Tina